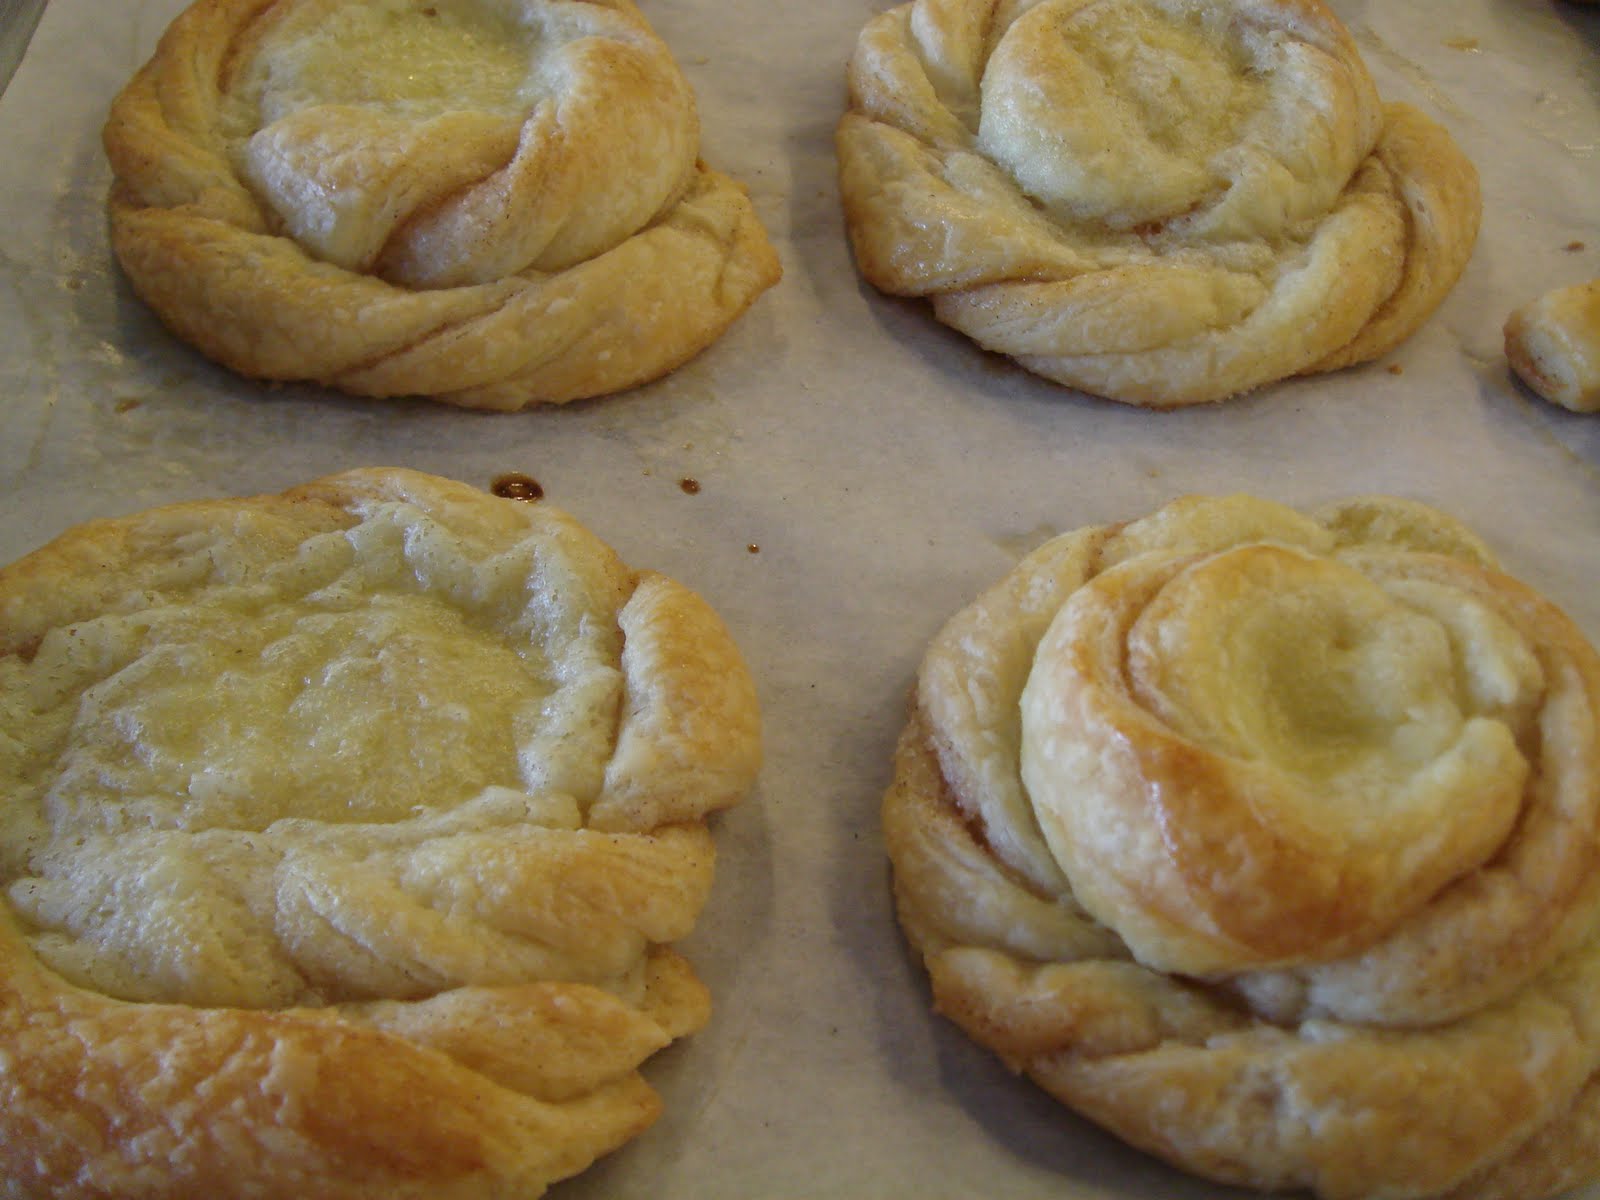
What a loooooong time it has been (again)! Not much time to do actual baking as of late - except for a few repeats of the classic recipes. But here's something I couldn't wait to try as soon as I saw it online.
We are all familiar with my "crack fish" yes?
Well, when I went to Unique LA a couple of weekends ago... I came across Bacon Crack from Cast Iron Gourmet. SO good... and then I didn't feel so un-PC by calling my crackers "crack fish".
So when I found this recipe for "chocolate crack"... why the hell not give this a shot? Plus, all I had to pick up from the store were the saltines.
Chocolate 'Crack' from Serious Eats
Ingredients:
Approx 2 sleeves Saltine Crackers
8oz Unsalted Butter
8oz Dark Brown Sugar
1tsp Vanilla Extract
12oz (or random handfuls) of Dark Chocolate (chopped or chips)
Line a half sheet pan with aluminum foil.
Then lay flat saltine crackers all along the bottom of the lined tray.
Melt butter on the stove. Add sugar and vanilla. Cook until thick and bubbly.
Pour over crackers. Spread evenly.
Place into preheated 350 oven, until butter mixture gets super bubbly. (I might have pulled this out earlier and may not have reached optimal bubbly-ness.)
With butter mixture still hot, drop chopped or chips of chocolate all over the top. Let it melt from the residual heat and spread with a spatula.
Let cool to room temp. Then place in refridgerator to let it chocolate firm up.
*I sprinkled some sea salt on the top. I like a distinct contrast of salty and sweet.
This is definitely Trial 1. The crackers got a bit chewy/soggy. Perhaps from prematurely taking them out of the oven. And I think I would play with the thickness/thinness of the butter-sugar layer as well as the chocolate layer. But great flavors together. Got to brainstorm something for the texture. I want crunchy. Crunch crunch.
Showing posts with label recipe. Show all posts
Thursday, August 11, 2011
Wednesday, May 25, 2011
Sugar-crusted Strawberry Muffins
In the "early years" of my baking adventures, I would jot down recipes into this little 3"x5" Hello Kitty notebook. (What other way is there, really?)
And even so, I still look through it for treats to make! Thus, a re-visit to fresh strawberry muffins.
The source of the original recipe is now lost, but at least I still have it to work from!
Strawberry Muffins - yields 1 doz
2T Butter
2/3C Sugar
1/2C Milk
1 Egg
1/2tsp Salt
1-1/2C Flour
1tsp Baking Powder
1C Chopped Strawberries
Turbinado Sugar to top
Cream butter + sugar.
Add egg.
Add milk.
Then add the (already combined) dry ingredients.
Fold in fruit.
Portion into muffin cups.
Sprinkle with turbinado sugar.
Bake at 350 for 35 min, or until toothpick comes out clean.
And even so, I still look through it for treats to make! Thus, a re-visit to fresh strawberry muffins.
The source of the original recipe is now lost, but at least I still have it to work from!
![]() |
| Sugar-crusted Strawberry Muffins |
Strawberry Muffins - yields 1 doz
2T Butter
2/3C Sugar
1/2C Milk
1 Egg
1/2tsp Salt
1-1/2C Flour
1tsp Baking Powder
1C Chopped Strawberries
Turbinado Sugar to top
Cream butter + sugar.
Add egg.
Add milk.
Then add the (already combined) dry ingredients.
Fold in fruit.
Portion into muffin cups.
Sprinkle with turbinado sugar.
Bake at 350 for 35 min, or until toothpick comes out clean.
Wednesday, March 23, 2011
Lemon Bundt Cake
So, buddy Ila moved. Thus, a housewarming gift = cake. Cake made with the kugelhopf bundt pan she gave me!
Lemon Bundt Cake with Lemon Glaze (not pictured)
2.75C AP Flour
1.5 tsp Baking Powder
0.75 tsp Salt
8oz unsalted Butter
1.5C Granulated Sugar
4 Eggs
1 tsp Vanilla Extract
0.75C Milk
0.25C Lemon Juice (approx 2)
Lemon Zest from juiced lemons (approx 2)
Sift dry ingredients. Set aside.
Beat butter (at room temp) with sugar until light and fluffy.
Beat in eggs until combined. Then beat in vanilla extract.
Alternated adding in the dry and the liquid. Starting with the dry and ending with the dry.
Scrape down bowl as needed.
Spoon batter into prepared pan; Spread so that sides are higher than the center.
Bake at 325 for 55 to 60 min, toothpick test.
Once toothpick comes out clean and cake pulls away from the sides of the pan, transfer to wire rack and let cool for 15 minutes.
Then turn out cake and drizzle with lemon glaze. (OR, let cool completely before dusting with powdered sugar.)
Lemon Glaze (based off of Gonna Want Second's Kathleen Meyer Lemon Cake recipe)
0.25C Lemon Juice
8oz Powdered Sugar
2oz unsalted Butter, room temp
Just beat all together until smooth. Throw in some lemon zest too, if you like!
It was my first time using the pan, so I wasn't sure about how well it would release the cake after baking. I HEAVILY buttered and floured it all. But I must not have done a good job spreading in the butter into the nooks- or I should have tapped the pan to get out the airbubbles. Either way, I'm sure next time will be better.
Lemon Bundt Cake with Lemon Glaze (not pictured)
2.75C AP Flour
1.5 tsp Baking Powder
0.75 tsp Salt
8oz unsalted Butter
1.5C Granulated Sugar
4 Eggs
1 tsp Vanilla Extract
0.75C Milk
0.25C Lemon Juice (approx 2)
Lemon Zest from juiced lemons (approx 2)
Sift dry ingredients. Set aside.
Beat butter (at room temp) with sugar until light and fluffy.
Beat in eggs until combined. Then beat in vanilla extract.
Alternated adding in the dry and the liquid. Starting with the dry and ending with the dry.
Scrape down bowl as needed.
Spoon batter into prepared pan; Spread so that sides are higher than the center.
Bake at 325 for 55 to 60 min, toothpick test.
Once toothpick comes out clean and cake pulls away from the sides of the pan, transfer to wire rack and let cool for 15 minutes.
Then turn out cake and drizzle with lemon glaze. (OR, let cool completely before dusting with powdered sugar.)
Lemon Glaze (based off of Gonna Want Second's Kathleen Meyer Lemon Cake recipe)
0.25C Lemon Juice
8oz Powdered Sugar
2oz unsalted Butter, room temp
Just beat all together until smooth. Throw in some lemon zest too, if you like!
It was my first time using the pan, so I wasn't sure about how well it would release the cake after baking. I HEAVILY buttered and floured it all. But I must not have done a good job spreading in the butter into the nooks- or I should have tapped the pan to get out the airbubbles. Either way, I'm sure next time will be better.
Sunday, January 30, 2011
Tiramisu for me, Tiramisu for you!
Homemade tiramisu... not as daunting as it might seem.
I pared down the recipe to serve just two (instead of a whopping 8 people).
Recipe from my CIA book:
Yields 2 4" rounds - used springform pans
1/3C Espresso
2T+2t Kahlua/coffee liquer
1/2C Granulated Sugar- divided into 1/3C and the remainder
2 Egg yolks
1/3 of an Egg (tricky tricky - I divided using weight)
13oz. Mascarpone Cheese
1/3t Vanilla Extract
1 Large Egg White
16 stale Ladyfingers (approximately, I used a whole package of 24)
Cocoa powder for dusting
Powdered sugar for dusting
Combine espresso and Kahlua. Set aside.
Whisk together the 1/3C granulated sugar, egg yolks and the 1/3 of a whole egg. In the stand mixer bowl, set over simmering water, whisk until volume nearly doubles and becomes a light lemon yellow color.
Transfer bowl to mixer with whisk attachment and whip at high speed until mixture is cooled to room temperature.
Add half of the mascarpone cheese and vanilla extract at low speed until very smooth. Scrape bowl as needed. Add remaining mascarpone and mix enough to combine evenly.
In a separate bowl, whip egg white with remaining sugar until forms medium peaks. (This won't be very much). Fold beaten egg white into the mascarpone mixture.
Press 3-4 ladyfingers into the bottom of springform pan. Generously brush with espresso/Kahlua mix. Spread mascarpone filling on top. Top with ladyfingers and brush with espresso/Kahula. Repeat 3-4 times depending on height of your pan. End with mascarpone on top. Dust entire top with cocoa powder and powdered sugar.
Wrap and chill overnight in the fridge.
Carefully unmold! And enjoy!
I pared down the recipe to serve just two (instead of a whopping 8 people).
Recipe from my CIA book:
Yields 2 4" rounds - used springform pans
1/3C Espresso
2T+2t Kahlua/coffee liquer
1/2C Granulated Sugar- divided into 1/3C and the remainder
2 Egg yolks
1/3 of an Egg (tricky tricky - I divided using weight)
13oz. Mascarpone Cheese
1/3t Vanilla Extract
1 Large Egg White
16 stale Ladyfingers (approximately, I used a whole package of 24)
Cocoa powder for dusting
Powdered sugar for dusting
Combine espresso and Kahlua. Set aside.
Whisk together the 1/3C granulated sugar, egg yolks and the 1/3 of a whole egg. In the stand mixer bowl, set over simmering water, whisk until volume nearly doubles and becomes a light lemon yellow color.
Transfer bowl to mixer with whisk attachment and whip at high speed until mixture is cooled to room temperature.
Add half of the mascarpone cheese and vanilla extract at low speed until very smooth. Scrape bowl as needed. Add remaining mascarpone and mix enough to combine evenly.
In a separate bowl, whip egg white with remaining sugar until forms medium peaks. (This won't be very much). Fold beaten egg white into the mascarpone mixture.
Press 3-4 ladyfingers into the bottom of springform pan. Generously brush with espresso/Kahlua mix. Spread mascarpone filling on top. Top with ladyfingers and brush with espresso/Kahula. Repeat 3-4 times depending on height of your pan. End with mascarpone on top. Dust entire top with cocoa powder and powdered sugar.
Wrap and chill overnight in the fridge.
Carefully unmold! And enjoy!
Tuesday, January 4, 2011
Homemade Marshmallows
One of the new items for the holiday baking this year was homemade marshmallows. I had made them in class and thought it was super easy to make - not much time needed and so few ingredients. I "jazzed" mine up for winter with some peppermint extract instead of vanilla. But I probably should have gone less than a full tablespoon since the peppermint flavor came out fairly strong - I decided to "counteract" that with some melted semi-sweet chocolate chip spread on one side.
Let's do the mini tutorial thing again yeah? You'll need a kitchenaid mixer - BTW.
Step 1: Combine 3 envelopes of gelatin (or 2T+3/4t) in mixer bowl and let soften with 3/4C water.
Step 1a: Prepare pan, depending on size and shape of marshmallows you want. I used a half-sheet and got flatter marshmallows vs. thick cubes. I greased with vegetable oil then sifted powdered sugar over. (You probably DON'T need to sift the sugar over).
Step 2: Melt 2 Cups sugar, 3/4C light corn syrup and 3/4C water, boil until 240 degrees (softball stage).
Step 3: Remove from heat then add stir in an additional 1/4C light corn syrup.
Step 4: Start the mixer with the gelatin and carefully pour the hot mixture. Beat on high (approx 10 min) until mixture is triple in volume and thick. Beat in your flavoring (1T of vanilla, or peppermint extract - use caution with the strength of your flavoring)
Step 5: Spread the mixture into prepared pan, smoothing as much as possible. Set aside uncovered for 8 to 10 hours at room temp.
Step 6: Dust your workspace with powdered sugar to cut. Dip cut sides into powdered sugar. Store in airtight container for up to 3 weeks.
Optional Step 7: Melt semisweet chocolate and spread on top side. Let set before packaging.
Enjoy!
Let's do the mini tutorial thing again yeah? You'll need a kitchenaid mixer - BTW.
Step 1: Combine 3 envelopes of gelatin (or 2T+3/4t) in mixer bowl and let soften with 3/4C water.
Step 1a: Prepare pan, depending on size and shape of marshmallows you want. I used a half-sheet and got flatter marshmallows vs. thick cubes. I greased with vegetable oil then sifted powdered sugar over. (You probably DON'T need to sift the sugar over).
Step 2: Melt 2 Cups sugar, 3/4C light corn syrup and 3/4C water, boil until 240 degrees (softball stage).
Step 3: Remove from heat then add stir in an additional 1/4C light corn syrup.
Step 4: Start the mixer with the gelatin and carefully pour the hot mixture. Beat on high (approx 10 min) until mixture is triple in volume and thick. Beat in your flavoring (1T of vanilla, or peppermint extract - use caution with the strength of your flavoring)
Step 5: Spread the mixture into prepared pan, smoothing as much as possible. Set aside uncovered for 8 to 10 hours at room temp.
Step 6: Dust your workspace with powdered sugar to cut. Dip cut sides into powdered sugar. Store in airtight container for up to 3 weeks.
Optional Step 7: Melt semisweet chocolate and spread on top side. Let set before packaging.
| You might want to do a neater job of spreading chocolate than I did. |
Tuesday, December 28, 2010
Holiday baking bonanza! (part I)
The 2nd annual holiday bakefest with my friend and I:
Rich Roll Butter Cookies with Royal Icing
8oz. butter, room temp
2/3C Sugar
1 egg
2 1/2C sifted AP flour
1/2t salt
1t vanilla
Cream butter and sugar. Beat in egg and vanilla. Mix in flour until smooth and just combined.
Chill dough for minimum 3 hours before rolling out.
Roll out on lightly floured surface to 1/4 inch thick. (You want to have a pretty decent thickness since the royal icing isn't all that tasty if it overwhelms the cookie.)
Bake at 350 for 7-12 min until lightly browned.
Royal Icing
-used Wilton Meringue Powder and its accompanying recipe
Icing and decorate cookies as desired. Let icing harden/dry completely before packaging or stacking.
With all of these goodies, some people got some overflowing gift baskets!
![]() |
| Rich Roll Butter Cookies with Royal Icing (recipe to follow - so easy!) |
![]() |
| Brown Rim Sugar Cookies |
![]() |
| Rocky Road Bites |
![]() |
| Pumpkin Cake loaves and trees |
![]() |
| Chunky Chocolate Gob Cookies - recipe from Kathleen at Gonna Want Seconds |
8oz. butter, room temp
2/3C Sugar
1 egg
2 1/2C sifted AP flour
1/2t salt
1t vanilla
Cream butter and sugar. Beat in egg and vanilla. Mix in flour until smooth and just combined.
Chill dough for minimum 3 hours before rolling out.
Roll out on lightly floured surface to 1/4 inch thick. (You want to have a pretty decent thickness since the royal icing isn't all that tasty if it overwhelms the cookie.)
Bake at 350 for 7-12 min until lightly browned.
Royal Icing
-used Wilton Meringue Powder and its accompanying recipe
Icing and decorate cookies as desired. Let icing harden/dry completely before packaging or stacking.
With all of these goodies, some people got some overflowing gift baskets!
Sunday, December 12, 2010
Holidays are here (again)!
Its been an intense few weeks... and it doesn't help to have a million+ things to do for the holidays. I have yet to do ANY shopping, and there isn't even any time to plan my own party!
I did get a breather this weekend though... and was able to do some baking for a friend's party.
Pumpkin Cake with Cream Cheese Frosting - the usual recipe, just shaped different.
Spicy Country Crackers/ or Flatbread (as it was called that night)
For the dough: (sooo easy!) You just need either a)the willingness to roll it super super thin by hand, or b) have a pasta machine.
3C AP Flour
1t Kosher Salt
1C + 2T Cold Water
Mix together in a bowl so it combines, then turn out onto lightly floured surface to knead a few times to form into a ball. (Will be somewhat crumbly- don't be afraid.)
Wrap tightly in plastic wrap, then put into fridge for at least 30 min.
Chili Oil:
1/4C EVOO
2t Crushed Dried Chilis
Warm oil in pot. Take off hear and add the chilies and allow to steep for 1 hour.
Toppings: (actual amounts can be up to you)
2oz grated parmesan or hard pecorino
1/4C Thyme leaves, chopped
coarsely ground black pepper to taste
kosher salt to taste
This is a totally versatile recipe... you can sprinkle whatever herbs and spices you want. Too bad I'm not very creative in that department, so I just follow recipes as I see them. :)
Bake at 350 until browned and crispy, about 15 min.
I did get a breather this weekend though... and was able to do some baking for a friend's party.
Pumpkin Cake with Cream Cheese Frosting - the usual recipe, just shaped different.
| 8in round base, with 6 tree shapes. (Recipe yielded a total of 12 trees) |
Spicy Country Crackers/ or Flatbread (as it was called that night)
| Yep. Busted out the Craigslist appropriated pasta machine. |
| Chili Oil. |
![]() |
| Roll out dough until it is thin enough to see through. (reminds me of latex gloves) Then brush with the Chili Oil. |
![]() |
| Before/After: Seasoned with Salt and Pepper, Sprinkled with Thyme and Parmesan |
![]() |
| Break into shards and share! |
3C AP Flour
1t Kosher Salt
1C + 2T Cold Water
Mix together in a bowl so it combines, then turn out onto lightly floured surface to knead a few times to form into a ball. (Will be somewhat crumbly- don't be afraid.)
Wrap tightly in plastic wrap, then put into fridge for at least 30 min.
Chili Oil:
1/4C EVOO
2t Crushed Dried Chilis
Warm oil in pot. Take off hear and add the chilies and allow to steep for 1 hour.
Toppings: (actual amounts can be up to you)
2oz grated parmesan or hard pecorino
1/4C Thyme leaves, chopped
coarsely ground black pepper to taste
kosher salt to taste
This is a totally versatile recipe... you can sprinkle whatever herbs and spices you want. Too bad I'm not very creative in that department, so I just follow recipes as I see them. :)
Bake at 350 until browned and crispy, about 15 min.
Monday, October 11, 2010
Cooked Frosting
Seems like cooked frosting is as old as dirt... but I've only just recently come across it! It came to me on a piece of scratch paper, the "recipe" hastily and vaguely written in pencil. So with some research and guessing, I composited the Cooked Frosting recipe:
1 C Milk
3Tbsp AP Flour
1/2C Butter
1/2C Crisco
1C Sugar
1/4tsp Vanilla
Cook milk in small saucepan. Slowly add flour. Stir until thick, like pudding. (I only got it to "light sour cream consistency")
Let milk+flour mixture cool completely.
Once cool, beat with room temperature butter and Crisco. (You could use all butter. I think I might next time.)
Beat in the sugar and vanilla.
Frosting should be fluffy - beat for a while until you get a good consistency.
Chill before icing.
I'm guessing you can use this as a nice base frosting and flavor as you like! I haven't tried anything though. But I do really like the fluffiness and thickness of it!
1 C Milk
3Tbsp AP Flour
1/2C Butter
1/2C Crisco
1C Sugar
1/4tsp Vanilla
Cook milk in small saucepan. Slowly add flour. Stir until thick, like pudding. (I only got it to "light sour cream consistency")
Let milk+flour mixture cool completely.
Once cool, beat with room temperature butter and Crisco. (You could use all butter. I think I might next time.)
Beat in the sugar and vanilla.
Frosting should be fluffy - beat for a while until you get a good consistency.
Chill before icing.
I'm guessing you can use this as a nice base frosting and flavor as you like! I haven't tried anything though. But I do really like the fluffiness and thickness of it!
Monday, October 4, 2010
The All-In Peanut Butter Cookies
All-in? Whaaaaat? Meaning, ALL THINGS PEANUT. ok. Peanut Butter and Roasted Peanuts. But that's still fancy no?
Yummy!! I made these vegan... anything with PB is awesome!!
The Whole Jar of Peanut Butter Cookies - vegan style!
1C Vegan butter, not cold, but not TOO room temp
3/4C White Sugar
1C packed Brown Sugar
3 Vegan "eggs"
2tsp Vanilla Extract
1 (18 oz) jar Peanut Butter
2-1/2C AP Flour
1-1/2tsp Baking Soda
1C Chopped Peanuts
Cream butter and sugars. Add in egg. Then vanilla and PB. Then add the flour and baking soda. Mix in the chopped peanuts. Smoosh down onto prepared baking sheet. (Vegan cookies don't seem to spread much by themselves... so give it a little smoosh!)
Wednesday, September 22, 2010
Turning 26! (Been there, done that.)
Mine has already passed, and now... on to the next one!
And we celebrated the one way we always celebrate - food, friends, and fun. Usually pretty low key. In fact, I can't really remember back to when we've been off-the-wall ridiculous. 22? 23? Lightyears ago it seems.
Anyways, on to the quintessential birthday cake!
Lemon Curd - recipe to follow
Italian Buttercream - recipe to follow
This cake took me an entire afternoon. That's what happens when you have no ingredients and bake completely from scratch. (I might as well have also churned the butter myself!)
I wasn't 100% confident in my chiffon cake abilities, since my cakes generally turn out to be more dense than light. SO! Here we go:
Lemon Curd:
4 Eggs
4 Egg Yolks
1C Sugar
Zest from 2 Lemons
3/4C Lemon Juice (took me about 5 lemons, why?!?!?!?!)
8oz butter, cubed
Combine eggs, yolks, sugar, zest and juice over double boiler.
Add butter and cook. Stir until thick - a light sour cream consistency.
Strain (in case of any unfortunate cooked egg chunks, or pulp.)
Italian Buttercream:
5 Egg Whites
Pinch of Salt
1lb Butter, room temp
1/4C Sugar + 3/4C Sugar
1/4C Water
Combine water and ONLY 3/4C Sugar in small pot. Heat to boiling.
When sugar starts to cook, turn on stand mixer with egg whites and pinch of salt. Let beat to fluffy meringue.
(Should get soapy looking - if not, re-do with CLEAN egg whites.)
Continue to boil sugar until it threads in ice water, and you can pick up the piece in your hand. (detailed explanation to follow)
Egg whites should be "soft peaks" by this time. CAREFULLY, pour in the hot sugar to the egg whites.
Continue to beat until the mixing bowl cools back down to room temp/comfortable to the touch.
Throw in butter cubes as mixer continues to beat. BEAT BEAT BEAT BEAT BEAT! And.... DONE!
In my experiences, the meringue does deflate once you throw in the butter. I haven't been able to get it back to being as light and fluffly as I did in class - the first time I've ever made this buttercream. (Maybe I misremembered the texture...)
Iced Water Test:
So you got the sugar boiling - HOT HOT HOT - use a metal spoon and dip in to scoop up just a bit of the bubbling sugar. Drizzle into the bowl iced water. You should be able to SEE the thread of sugar in the iced water. Try to pick up that sugar. If you can pick it up, and roll it into a ball - its ready to be poured into the meringue! (I forget what the exact term would be... "hard ball", "soft ball"?)
Final Notes - yummy! Cake was light and fluffy - success!
And we celebrated the one way we always celebrate - food, friends, and fun. Usually pretty low key. In fact, I can't really remember back to when we've been off-the-wall ridiculous. 22? 23? Lightyears ago it seems.
Anyways, on to the quintessential birthday cake!
Triple Layer Lemon Chiffon Cake with Lemon Curd and Italian Buttercream
Cake recipe from Tender CrumbLemon Curd - recipe to follow
Italian Buttercream - recipe to follow
This cake took me an entire afternoon. That's what happens when you have no ingredients and bake completely from scratch. (I might as well have also churned the butter myself!)
I wasn't 100% confident in my chiffon cake abilities, since my cakes generally turn out to be more dense than light. SO! Here we go:
| BOWL FULL of fluffy cake batter |
| out of the oven! Cakes pull away from the pan as they cool. (the tops of mine were still sticky - so i worried a bit). |
Lemon Curd:
4 Eggs
4 Egg Yolks
1C Sugar
Zest from 2 Lemons
3/4C Lemon Juice (took me about 5 lemons, why?!?!?!?!)
8oz butter, cubed
Combine eggs, yolks, sugar, zest and juice over double boiler.
Add butter and cook. Stir until thick - a light sour cream consistency.
Strain (in case of any unfortunate cooked egg chunks, or pulp.)
| Hmmmm. Note to self: Distribute cake batter EVENLY among pans. |
5 Egg Whites
Pinch of Salt
1lb Butter, room temp
1/4C Sugar + 3/4C Sugar
1/4C Water
Combine water and ONLY 3/4C Sugar in small pot. Heat to boiling.
When sugar starts to cook, turn on stand mixer with egg whites and pinch of salt. Let beat to fluffy meringue.
(Should get soapy looking - if not, re-do with CLEAN egg whites.)
Continue to boil sugar until it threads in ice water, and you can pick up the piece in your hand. (detailed explanation to follow)
Egg whites should be "soft peaks" by this time. CAREFULLY, pour in the hot sugar to the egg whites.
Continue to beat until the mixing bowl cools back down to room temp/comfortable to the touch.
Throw in butter cubes as mixer continues to beat. BEAT BEAT BEAT BEAT BEAT! And.... DONE!
In my experiences, the meringue does deflate once you throw in the butter. I haven't been able to get it back to being as light and fluffly as I did in class - the first time I've ever made this buttercream. (Maybe I misremembered the texture...)
Iced Water Test:
So you got the sugar boiling - HOT HOT HOT - use a metal spoon and dip in to scoop up just a bit of the bubbling sugar. Drizzle into the bowl iced water. You should be able to SEE the thread of sugar in the iced water. Try to pick up that sugar. If you can pick it up, and roll it into a ball - its ready to be poured into the meringue! (I forget what the exact term would be... "hard ball", "soft ball"?)
Final Notes - yummy! Cake was light and fluffy - success!
Friday, September 17, 2010
Class II Day 2: Danishes and Diner Cinnamon Rolls
We finished up the danish dough from last week... danish galore!
My personal favorite:
Pecan Alligator ('cause it looks like an alligator tail, get it?)
Pecan Filling (can be prepared and stored up to 1 week in fridge) - soooo good!
This can also be almond instead of pecan. (Or any nut in fact)
Yields 1 Cup
1C Pecans
1/2C Powdered Sugar
1oz Unsalted Butter, room temp
1/2t Vanilla Extract
1 large egg white, lightly beaten
Pulse nuts and sugar in food processor. Once finely ground, add in butter, extract and egg white. Mix together.
Use at room temp.
Other danish shapes: bearclaw (with almond filling), pinwheel with a cream cheese filling, and triangle with an apricot filling.
All this shaping and rolling was reminiscent of the croissant and puff pastry class.
Diner Cinnamon Rolls
YUM! Similar but so different from the Pain au Raisin and Brioche Cinnamon Rolls from before...
My personal favorite:
Pecan Alligator ('cause it looks like an alligator tail, get it?)
Pecan Filling (can be prepared and stored up to 1 week in fridge) - soooo good!
This can also be almond instead of pecan. (Or any nut in fact)
Yields 1 Cup
1C Pecans
1/2C Powdered Sugar
1oz Unsalted Butter, room temp
1/2t Vanilla Extract
1 large egg white, lightly beaten
Pulse nuts and sugar in food processor. Once finely ground, add in butter, extract and egg white. Mix together.
Use at room temp.
Other danish shapes: bearclaw (with almond filling), pinwheel with a cream cheese filling, and triangle with an apricot filling.
All this shaping and rolling was reminiscent of the croissant and puff pastry class.
| After crappy rolling and shaping. |
| Bear Claws with Almond Filling |
| Pinwheels with Cream Cheese Filling |
| Apricot "Triangles" |
| All packed up! |
YUM! Similar but so different from the Pain au Raisin and Brioche Cinnamon Rolls from before...
| MASSIVE. |
| Pre-icing |
| Let the sugar rush commence! |
Subscribe to:
Posts (Atom)